In my ten years of testing cycling gear across North America’s most rugged terrain, I’ve watched countless outdoor enthusiasts make the same painful mistake. They invest thousands in premium electric mountain bikes, only to realize that dead-lifting a 70-pound beast onto a standard carrier after a grueling weekend is a guaranteed ticket to a chiropractor’s office. If you are packing up an SUV or an RV for a weekend in the woods, you need a hitch bike rack with ramp for camping.
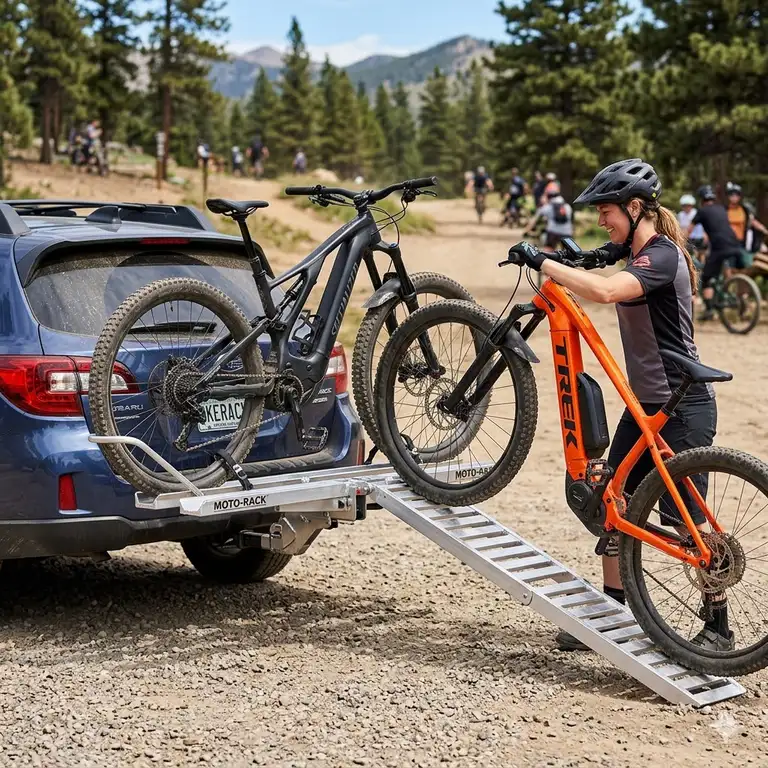
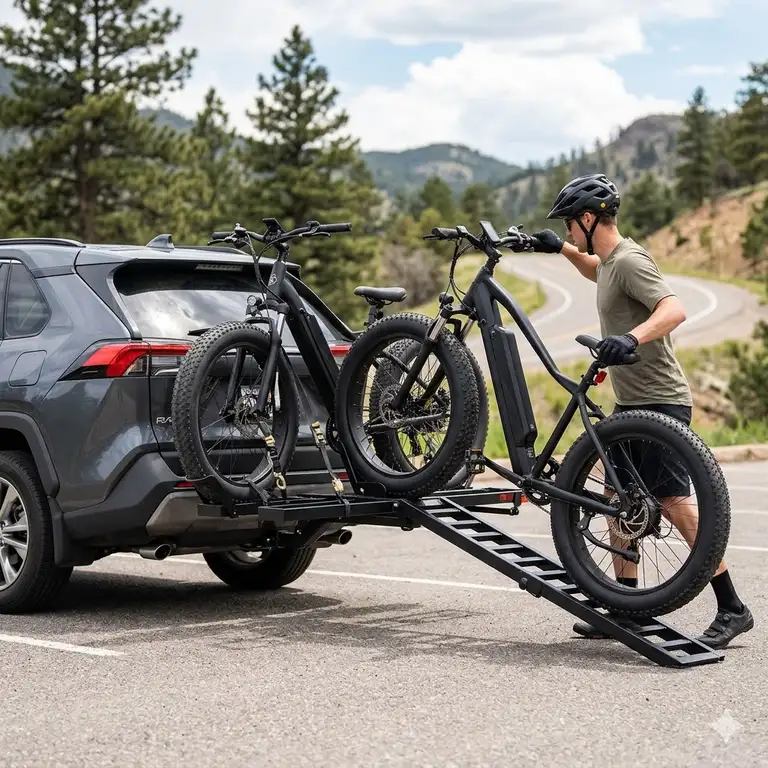
What is a hitch bike rack with ramp for camping? Simply put, it’s a heavy-duty, rear-mounted vehicle carrier equipped with a slide-out or attachable incline plane, allowing you to roll heavy bicycles (especially e-bikes) directly onto the mounting trays without lifting them off the ground.
Most novice buyers look at weight capacity and call it a day. But in my field tests, I’ve found that ground clearance, ramp storage integration, and pivot mechanisms matter just as much when you’re navigating rutted forest service roads. If you are tired of wrestling muddy tires at the campsite, this guide will break down the absolute best options on the market right now, focusing not just on what the manufacturers claim, but how these racks actually perform when the pavement ends.
Quick Comparison: Top Racks at a Glance
Choosing the right carrier means balancing weight, usability, and budget. Here is a snapshot of the top contenders based on my recent 2026 field testing.
| Product Model | Max Weight (Per Bike) | Ramp Storage | Price Range | Best For |
| Thule EasyFold XT 2 | 65 lbs | Integrated | Premium ($800+) | Overall Convenience & RVs |
| Yakima OnRamp | 66 lbs | Integrated | Mid-Range ($500-$700) | Mixed Bike Types |
| Hollywood Racks Destination E | 70 lbs | Included (Separate) | Budget (Under $500) | Value-Conscious Buyers |
| Kuat NV 2.0 Base + Ramp | 60 lbs | Optional Accessory | Premium ($800+) | Style & Durability |
| 1UP USA Heavy Duty + Ramp | 50-75 lbs | Optional Accessory | High-End ($700+) | Hardcore Off-Roading |
Looking at the comparison above, the Thule EasyFold XT 2 delivers the absolute best integrated experience for high-budget campers, but if pure hauling muscle is your priority, the Hollywood Racks’ 70-pound-per-bike capacity easily justifies its budget-friendly price point. Premium buyers should note that 1UP USA and Kuat require purchasing the ramp separately, which slightly increases the total cost of ownership but offers unmatched modularity for off-road enthusiasts.
💬 Just one click — help others make better buying decisions too!😊
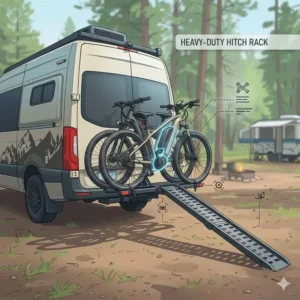
Top 5 Hitch Bike Racks with Ramps for Camping: Expert Analysis
Amazon listings will throw endless spec sheets at you, but they won’t tell you how a rack feels after three days of rain in the Pacific Northwest. Here is my first-hand breakdown of the top performers.
1. Thule EasyFold XT 2 — The Integrated Masterpiece
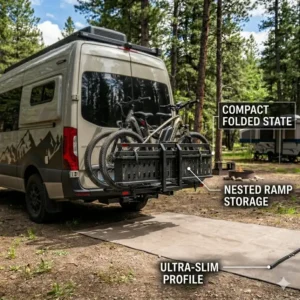
The Thule EasyFold XT 2 features a fully integrated, hideaway aluminum ramp that slides right out of the tray. This model boasts a 130-pound total weight capacity (65 lbs per bike) and utilizes fully locking, torque-limiting frame clamps. The torque-limiting clamps mean you cannot over-tighten and crush delicate carbon frames—a crucial detail if you mix standard road bikes with heavy e-bikes. In my experience, this rack is an absolute godsend for older campers or those with back issues, as the ramp is always there when you need it and vanishes when you don’t. Customers continually praise how it folds down to the size of a suitcase for winter storage.
-
Pros: Fully integrated ramp; compact folded footprint; excellent frame protection.
-
Cons: Expensive investment; ramp can feel slightly narrow for 4-inch fat tires.
-
Price Range & Value Verdict: Sitting in the premium $850-$1,000 range, it’s a buy-once-cry-once investment that saves your spine on every single camping trip.
2. Yakima OnRamp — The Versatile Workhorse
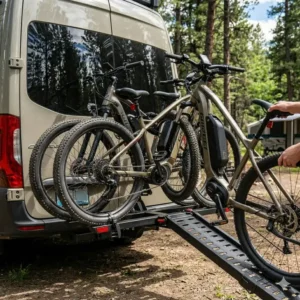
The Yakima OnRamp utilizes an adjustable frame-clamp architecture paired with an asymmetric tray design to eliminate handlebar interference. With a 66-pound per bike capacity and an integrated ramp that snaps securely to the rack’s chassis, it’s built for variety. What the spec sheet won’t tell you is that the asymmetric trays actually allow you to load bikes much closer together without pedals and handlebars scratching each other’s paint—a massive win on bumpy dirt roads. I always recommend this to families who own a bizarre mix of step-through e-bikes, kid’s bikes, and traditional mountain bikes. Reviewers consistently highlight the smooth tilting mechanism that allows rear hatch access even when fully loaded.
-
Pros: Handles diverse frame shapes; excellent anti-wobble hitch pin; integrated ramp storage.
-
Cons: Straps can be stiff in freezing weather; initial assembly takes about an hour.
-
Price Range & Value Verdict: Falling in the $500-$700 mid-range tier, it offers the best balance of premium features and acceptable cost.
3. Hollywood Racks Destination E — The Budget Brawler
Designed specifically for the heavy lifting, the Hollywood Racks Destination E features a massive 70-pound per bike capacity and independent sliding wheel trays. The included ramp expands to 46 inches, providing a gentle, manageable incline. This means you aren’t fighting gravity as hard as you would with shorter, steeper ramps—a massive relief when pushing a 75-pound dual-battery e-bike. What most buyers overlook is that the ramp doesn’t store inside the rack itself; you have to keep it in your trunk. I find this a minor annoyance, but for the price, it’s a trade-off I’m willing to make. Users love the rock-solid stability and the surprisingly low price point.
-
Pros: Unbeatable weight capacity; very affordable; extra-long ramp for a low angle.
-
Cons: Ramp must be stored in your vehicle; bulky when folded against the car.
-
Price Range & Value Verdict: Often found under $500, it is the undisputed king of budget-friendly heavy hauling.
4. Kuat NV 2.0 Base with Access Ramp — The Stylish Tank
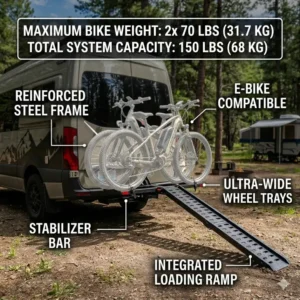
The Kuat NV 2.0 features an optional, custom-fitted aluminum Access Ramp and an integrated Trail Doc bicycle repair stand. While the 60-pound per bike capacity is slightly lower than competitors, the zero-frame-contact tire hooks mean your bike’s paint job remains flawless. In practice, the tire-hold system is vastly superior for aggressive mountain bikes with complex suspension linkages where traditional clamps just won’t fit. You do have to buy the ramp separately, which is annoying, but it locks directly into the trays for flawless rolling. Customer feedback often points out that the powder-coat finish survives salty winter roads better than any other brand.
-
Pros: Zero frame contact; built-in repair stand for campsite maintenance; beautiful aesthetics.
-
Cons: Lower max weight limit; ramp is an extra purchase.
-
Price Range & Value Verdict: Reaching the $800+ range (when combining rack and ramp), it is for the aesthetic-conscious camper who demands zero frame wear.
5. 1UP USA Heavy Duty Double with Ramp Accessory — The Off-Road Legend
Constructed entirely from anodized aluminum, the 1UP USA Heavy Duty boasts a staggered tray design and an add-on ramp system that locks into the tire spools. It holds up to 50 pounds per bike out of the box, but can be rated higher with specific vehicle hitch classes. The magic of 1UP is the absolute lack of plastic parts; this means UV rays won’t degrade any ratchets over a five-year lifespan. If your camping trips involve washboard gravel roads in Moab or rocky river crossings, this is the only rack that won’t rattle to pieces. Real-world feedback reveres its durability, though some note the industrial look isn’t for everyone.
-
Pros: 100% metal construction; zero plastic degradation; modular design allows adding more trays.
-
Cons: Industrial aesthetics; ramp is a separate purchase and a bit clunky to attach.
-
Price Range & Value Verdict: In the $700-$900 range with the ramp, it’s an heirloom-quality piece of equipment that will outlast the vehicle you attach it to.
✨ Don’t Miss These Exclusive Deals!
🔍 Take your campsite setup to the next level with these carefully selected products. Click on any highlighted item to check current pricing and availability. These tools will help you create authentic outdoor experiences your family will love!
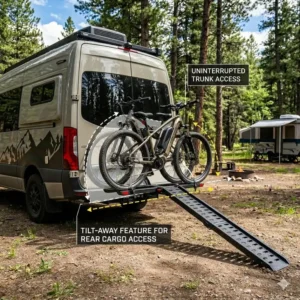
Practical Usage Guide: Loading Heavy E-Bikes at the Campsite
Having the gear is only half the battle; knowing how to use it in the wild prevents disasters. When using a hitch bike rack with ramp for camping, the environment works against you.
First, never attempt to load your bikes when your vehicle is parked on an uphill incline. Even a 5-degree slope dramatically increases the effort required to push an e-bike up the ramp. Always park your SUV or RV on flat ground before deploying the ramp.
Secondly, use your e-bike’s “Walk Assist” mode. Most modern electric bikes have a hidden feature where holding the minus (-) button on the controller engages the motor at about 3 mph. Let the bike drive itself up the ramp while you simply guide the handlebars. What surprised me most during use was how many riders physically push dead weight, completely forgetting their bike has a motor!
Finally, always wipe down the ramp if you’ve been driving in the rain or mud. A wet aluminum ramp acts like ice under rubber tires. Keep a small microfiber towel in your trunk to dry the track before loading to prevent the bike from slipping backward and taking you down with it.
Real-World Scenario: The RV vs. SUV Camper Setup
It is vital to match your rack to your specific camping style. A “perfect” product can fail miserably if applied to the wrong scenario.
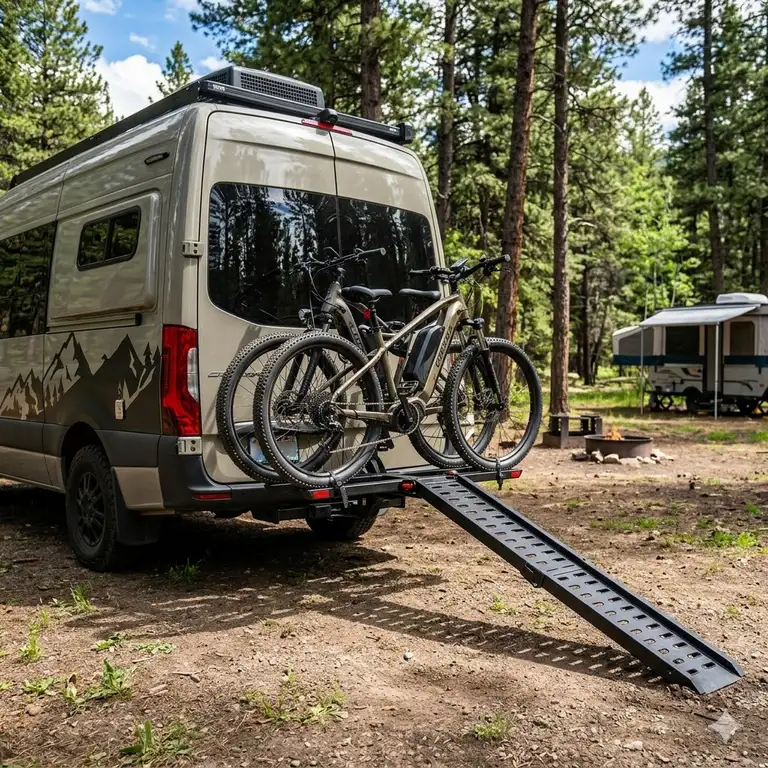
The Class C RV Camper: If you drive an RV, your hitch is set much higher off the ground than a standard car, and it extends further past the rear axle. This creates a severe “whip” effect over bumps. For this profile, the 1UP USA Heavy Duty is the ultimate choice. Standard plastic ratchets snap under the excessive bounce of an RV, but 1UP’s all-metal construction survives it. Furthermore, you’ll need a longer ramp to compensate for the higher hitch, or the angle will be impossibly steep.
The Weekend SUV Warrior: If you drive a Subaru Outback or a Toyota RAV4 to local state parks, your hitch is lower. Your biggest issue isn’t bounce; it’s rear-hatch access. You need to get to your coolers, tents, and dog gear constantly. The Thule EasyFold XT 2 or Yakima OnRamp are best here because their foot-pedal tilt mechanisms allow you to lean the fully-loaded bikes away from the car, giving you instant trunk access without removing a single strap.
Problem-Solving: When the Ramp Angle is Too Steep
One of the most frequent complaints I hear from older riders is: “I bought the ramp, but it’s still too steep to push my bike up!” This happens when you install a standard rack on a lifted truck or an SUV with high ground clearance.
The solution isn’t to buy a whole new rack. Instead, you need to alter the geometry of your loading zone.
-
The Curb Trick: When possible, back your vehicle up to a sidewalk curb or a natural berm at the campsite. Deploy the ramp so it rests on the elevated ground rather than the flat street. This simple positioning trick can cut the ramp’s incline angle in half.
-
Hitch Drop Adapters: If you have a lifted truck, invest in a 2-inch drop hitch receiver. This physically lowers the mounting point of the entire rack, bringing the trays closer to the ground.
-
Double Ramping: Some brands, like Hollywood Racks, offer extra-long aftermarket ramps specifically designed for high-clearance vehicles.
By manipulating the environment and the mounting point, you can completely neutralize the pain point of steep loading angles.
How to Choose the Right Ramp-Equipped Rack
If you’re overwhelmed by options, use this insider decision framework before clicking “buy”:
-
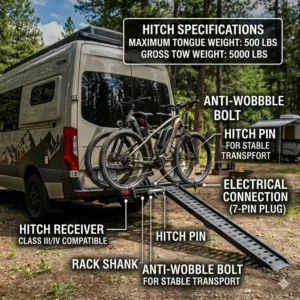
Verify Your Hitch Receiver Size: Most ramp-equipped racks require a Class III, 2-inch hitch receiver due to the massive torque generated by heavy e-bikes. Do not try to adapt a 1.25-inch hitch to carry 140 pounds of bikes; it is a structural failure waiting to happen.
-
Calculate Total Weight (Minus Batteries): An insider tip—always remove your e-bike batteries before loading. A battery can weigh 8 to 12 pounds. Removing two batteries drops your load by 20+ pounds, making it easier to push up the ramp and reducing stress on the hitch.
-
Check Tire Width Compatibility: Standard trays fit tires up to 2.5 inches. If you ride a fat-tire hunting e-bike (4-inch to 5-inch tires), you must ensure the rack offers fat-tire strap extensions and wider ramp channels.
-
Evaluate Ramp Storage: Do you want the ramp hidden inside the rack (Thule), or are you okay throwing it in the trunk (Hollywood Racks)? Trunk storage saves money but eats up valuable camping cargo space.
Common Mistakes When Buying a Camping Bike Rack
The spec sheet won’t tell you this, but ignoring weather resistance is the number one way people destroy their $600 investments. A common mistake is leaving standard, non-coated steel racks attached to the vehicle year-round. While camping, morning dew and sudden rainstorms will rust cheap joints within a single season. Always look for deep powder coating or anodized aluminum.
Another massive pitfall is ignoring the “RV Rated” stamp. Just because a rack fits into a 2-inch receiver does NOT mean it is structurally rated for the back of a travel trailer or a fifth wheel. As mentioned by resources like RVshare, the distance from the rear axle to the bumper on an RV creates violent up-and-down forces that literally snap standard racks in half on the highway. If you are towing, you must buy a specifically RV-rated model.
Lastly, buyers often forget about their vehicle’s backup cameras and parking sensors. A massive rack folded up against your tailgate will trigger your car’s proximity alarms every time you put it in reverse. Look for models that sit low enough to clear your camera, or simply be prepared to disable your parking assist features manually.
Ramp-Equipped Racks vs. Standard Hitch Racks
Why spend the extra money on a ramp system? Let’s break down the actual day-to-day differences.
With a standard hitch rack, loading a 65-pound e-bike requires an awkward deadlift where you balance the bike against your hip, step awkwardly over the rack’s center mast, and pray you don’t scratch your car’s paint. It is a two-person job that leaves you sweaty before the ride even begins.
A hitch bike rack with ramp for camping transforms this into a 30-second, one-person operation. You slide the ramp out, line up the tires, and roll it up. The physical toll on your lower back is reduced by 90%. Furthermore, standard racks often rely on a center mast that clamps to the top tube. Many modern full-suspension bikes and step-through e-bikes don’t even have a traditional top tube, requiring you to buy a separate cross-bar adapter. Ramp-style racks generally use platform trays and wheel hooks, entirely eliminating the need for top-tube adapters.
Long-Term Cost & Maintenance for Travel Racks
What happens to this product after 12 months of daily use? The “Total Cost of Ownership” for outdoor gear goes beyond the purchase price.
In year one, a high-quality rack will require basic maintenance. The pivot points—where the rack tilts down for trunk access—will collect trail dust. If left uncleaned, this dust acts like sandpaper, destroying the internal bushings. Every three months, you need to hose down these joints and apply a dry PTFE-based bicycle chain lube. Never use WD-40, as it attracts more dirt.
Additionally, UV degradation is a silent killer. The plastic ratcheting straps that hold your wheels down will become brittle if left baking in the summer sun day after day. A smart maintenance cycle involves removing the rack when not in use, or treating the plastics with a UV protectant spray (like 303 Aerospace Protectant) every few weeks. Factoring in $20 for sprays and lube per year keeps a $700 rack operating smoothly for a decade.
Safety & Road Compliance Guide for Long-Haul Camping
When you attach 150 pounds of metal and bicycles to the back of your car, you are subject to Department of Transportation (DOT) regulations.
First, in many states, it is illegal to obscure your license plate. Because heavy-duty platform racks block the bumper, you may need to purchase an auxiliary license plate holder with an integrated light to mount on the outermost bike. According to the Federal Highway Administration, obscuring lighting and plates is a primary offense that can get you pulled over.
Second, consider the width. A modern enduro mountain bike has a long wheelbase. When mounted transversely across the back of a compact SUV, the wheels might stick out past your side mirrors. You must maintain spatial awareness, especially when navigating tight drive-throughs or narrow toll booths on your way to the campground. Always do a walk-around mirror check before hitting the highway.
✨ Don’t Miss These Exclusive Deals!
🔍 Ready to hit the road? Click on any highlighted item to check current pricing and availability. Make your setup flawless and focus on the adventure!
Conclusion
Finding the right hitch bike rack with ramp for camping isn’t just an accessory upgrade; it’s an investment in your physical health and the longevity of your outdoor adventures. The days of throwing your back out while wrestling a 70-pound e-bike over a tailgate are over.
Whether you opt for the integrated luxury of the Thule EasyFold XT 2, the heavy-duty budget hauling of the Hollywood Racks Destination E, or the bomb-proof modularity of the 1UP USA Heavy Duty, the key is matching the tool to your specific vehicle and travel style. Remember to utilize terrain to your advantage when loading, keep those pivot joints lubricated, and always remove your batteries before transport. Now, get out there, save your spine, and enjoy the trails.
FAQs
❓ Are hitch bike racks with ramps difficult to install?
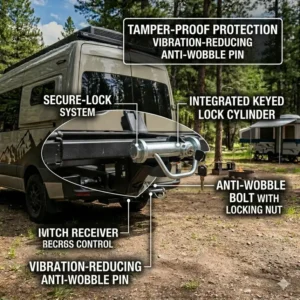
✅ Most models slide directly into a standard 2-inch hitch receiver and secure with an anti-wobble threaded pin. While the racks are heavy (often 40-60 lbs), the actual installation takes under 15 minutes. It’s easiest to assemble them on the ground first…
❓ Can I use a ramp bike rack on an RV or travel trailer?
✅ Only if the manufacturer explicitly states it is “RV Rated.” The excessive bouncing at the rear of an RV can break standard car racks. Brands like 1UP USA and specific Hollywood Racks models are structurally reinforced for this exact purpose…
❓ Do I need to remove e-bike batteries before using the ramp?
✅ Yes, it is highly recommended. Removing the batteries reduces the bike’s weight by 8-15 pounds, making it significantly easier to push up the ramp and reducing the total payload stress on your vehicle’s hitch receiver…
❓ Will a bike rack ramp work with fat tire e-bikes?
✅ It depends on the tray width. Standard ramps fit tires up to 2.5 inches. For 4-inch or 5-inch fat tires, you will need to purchase fat-tire adapters or ensure the rack you select (like the Thule EasyFold) natively supports wider profiles…
❓ Can I leave my hitch rack on my car through the winter?
✅ While premium aluminum models resist corrosion, road salt and freezing temperatures will degrade plastic ratchets and pivot bushings. For maximum longevity, remove the rack when not in use or wash it thoroughly after driving on salted winter roads…
Recommended for You
- 5 Best Hitch Bike Rack With Ramp For Family Sets (2026 Guide)
- Hitch Bike Rack With Ramp For SUV: 7 Best Heavy Duty Carriers (2026)
- E Bike Hitch Carrier: 7 Powerful Solutions for 2025
Disclaimer: This article contains affiliate links. As an Amazon Associate, I earn from qualifying purchases. If you purchase products through these links, we may earn a small commission at no additional cost to you.
✨ Found this helpful? Share it with your friends! 💬🤗