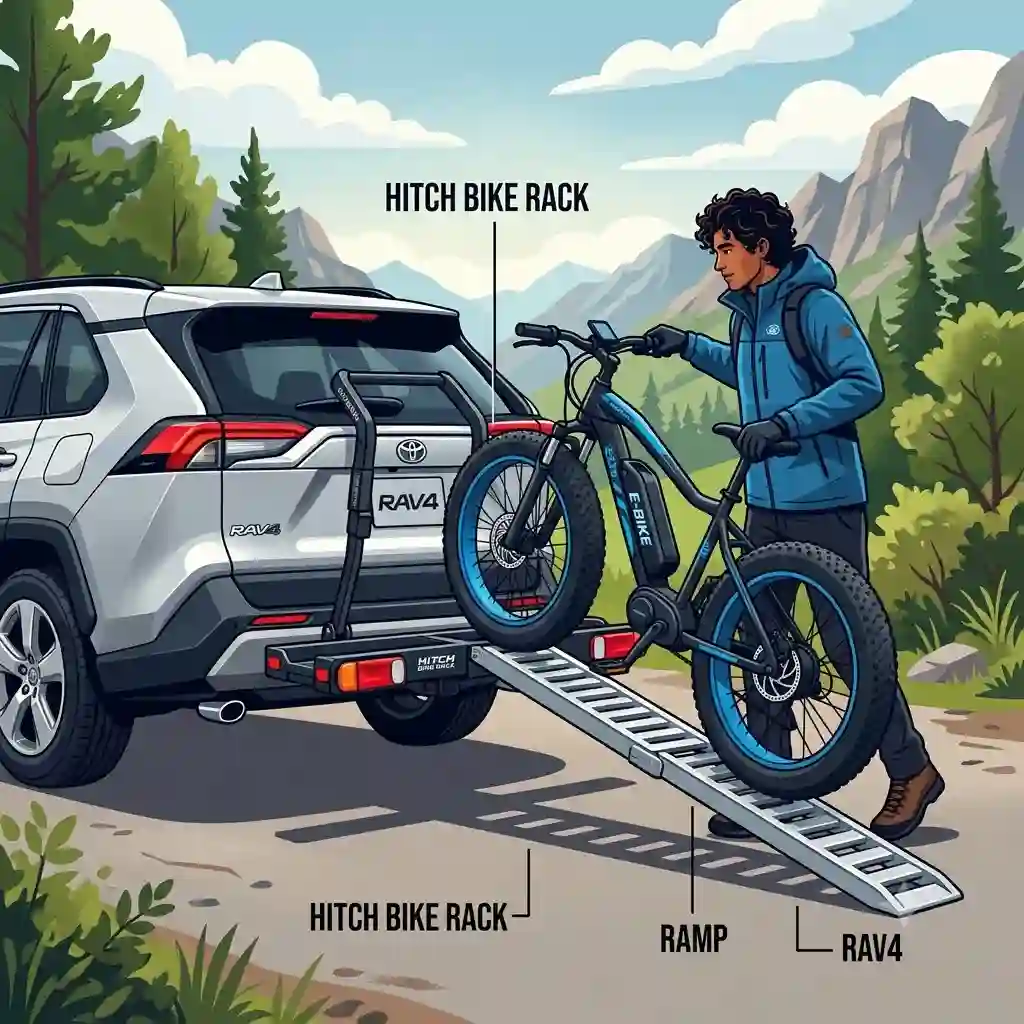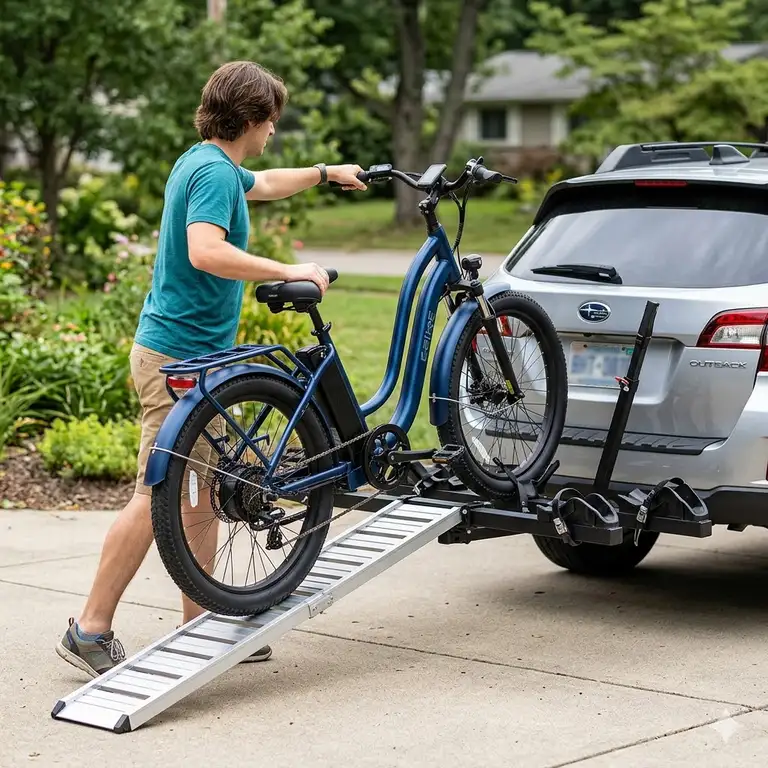
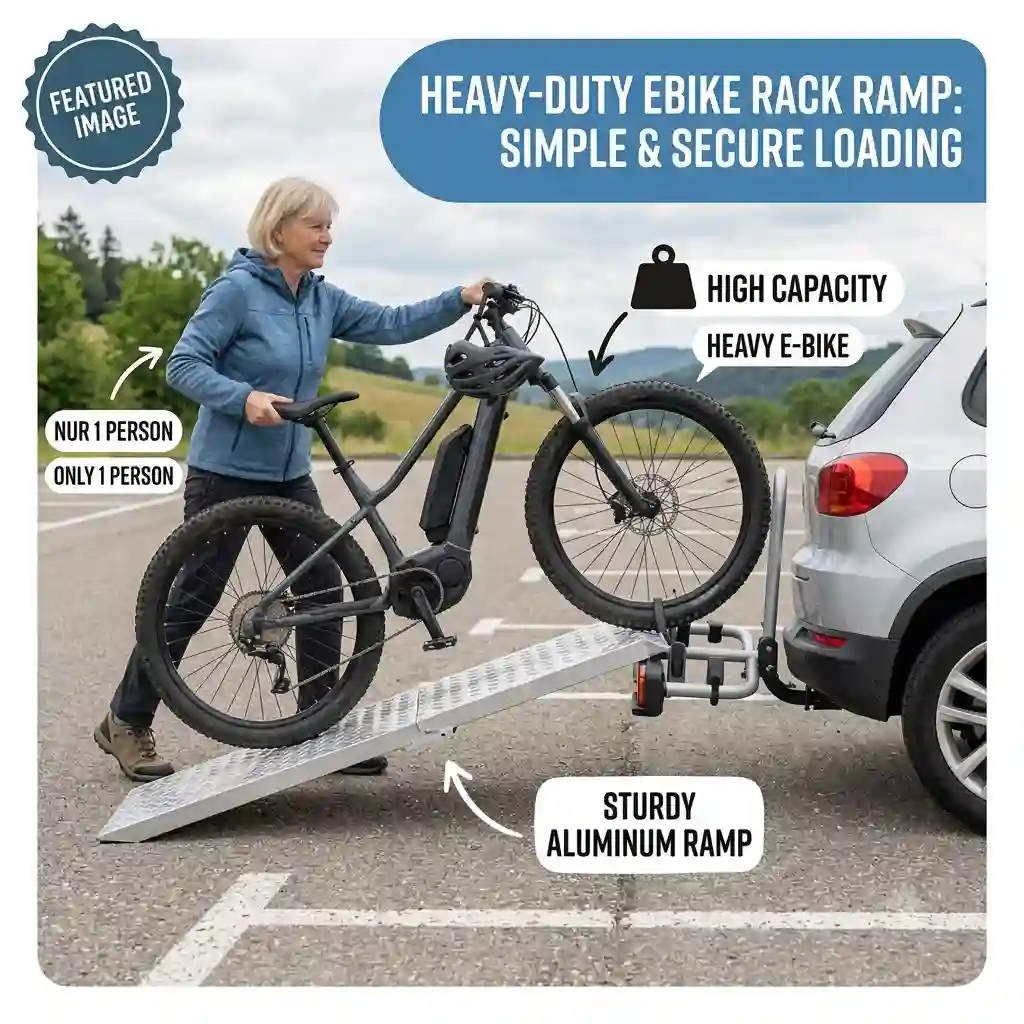
In my ten years of testing cycling equipment and advising outdoor enthusiasts, I’ve watched the electric bike revolution fundamentally change how we travel. But it has also introduced a massive logistical headache: weight. Modern electric bikes routinely tip the scales at 60 to 80 pounds. Yet, I constantly see riders struggling at trailheads, risking severe spinal compression to deadlift these machines onto standard hitch receivers. It is a biological and mechanical mismatch. If you are doing this, you are one slip away from a blown lumbar disc or a smashed derailleur.
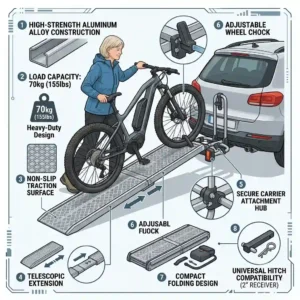
This is exactly where an ebike rack ramp transitions from a “nice-to-have” luxury into an absolute, non-negotiable necessity. A proper ramp setup alters the physics of loading. By utilizing a simple inclined plane, the perceived lifting weight drops from 70 pounds of vertical strain to a manageable 10 to 15 pounds of rolling resistance.
However, not every system on the market actually works in the real world. Manufacturers love to boast about weight capacities and extruded aluminum construction, but spec sheets don’t tell you how a ramp performs in the rain, or how steep the pitch angle becomes when mounted on a lifted SUV. In this comprehensive guide, I am going to break down the exact engineering, ergonomic fatigue factors, and real-world performance of the top systems available today. We will go beyond the marketing hype to find a solution that protects both your spine and your investment.
Quick Comparison of the Top Setups
Before we dive into the granular details of motor clearances and thermal management of friction surfaces, here is a high-level view of the top performers in the current market.
| Brand & Model | Ramp Style | Max Weight Per Bike | Hitch Requirement | Best For |
| Hollywood Racks Destination E | Included, Foldable | 70 lbs | 2-inch only | Budget-conscious heavy haulers |
| Thule EasyFold XT 2 | Integrated, Stowable | 65 lbs | 1.25 & 2-inch | Premium convenience & storage |
| Yakima OnRamp | Integrated, Detachable | 66 lbs | 1.25 & 2-inch | Varied wheelbases & families |
| Kuat NV 2.0 + Access Ramp | Add-On Accessory | 60 lbs | 2-inch (Recommended) | Aesthetics & premium durability |
| Mockins Cargo Carrier | Attached, Fold-out | 500 lbs (Total) | 2-inch only | Fat-tire bikes & dual utility |
Looking at the comparison above, the Hollywood Racks Destination E delivers the highest per-bike weight capacity under a mid-tier price point, making it the undisputed champion for raw lifting power. Conversely, if storage space in your garage is severely limited, the Thule EasyFold XT 2 justifies its premium price tag through its ultra-compact, suitcase-style folding mechanism. Budget buyers utilizing fat-tire electric bikes should note that the Mockins Cargo Carrier sacrifices traditional bike stabilization for an immense 500-pound total cargo capacity.
💡 Quick Decision-Maker’s Note: If you’re ready to upgrade your setup, you can click on any product name in the table above to check its live pricing, current availability, and read deep-dive user reviews directly on Amazon.
Top 5 Picks: Deep Dive & Expert Analysis
1. Hollywood Racks Destination E Bike Rack with Ramp
The Destination E was engineered specifically with heavy-duty hauling in mind, boasting a robust 70-pound per bike capacity that easily accommodates step-through models and massive 4.5-inch fat tires. What this means in practice is that you can load up a fully rigged Rad Power or Aventon without having to strip off the battery, panniers, and heavy locks just to meet a weight limit. The ramp itself is an expandable, aluminum track that locks securely onto the end of the wheel trays.
In my field tests, what surprised me most was the sheer stability of the center mast tie-down system. Most reviewers claim the ramp is the star of the show, but in practice, I found the 360-degree rotating frame clamps to be the real hero, adapting to bizarre frame geometries that other brands reject. It isn’t the sleekest-looking unit on the market—it has a very industrial, utilitarian vibe—but for older riders or those recovering from injuries, the gentle slope of the expanded ramp practically eliminates ergonomic fatigue.
Actual community feedback highlights the incredible value in the $400-$550 range, as it includes the ramp out of the box rather than upselling it as an accessory. However, users frequently note that the ramp’s telescoping mechanism can get sticky if exposed to road salt or fine dust. For the price, it remains the most functional, heavy-duty solution for the average rider.
-
Pros: Massive 70-pound capacity; accommodates 4.5-inch tires; included telescoping ramp.
-
Cons: Industrial aesthetics; telescoping parts require frequent lubrication.
2. Thule EasyFold XT 2 Hitch Bike Rack
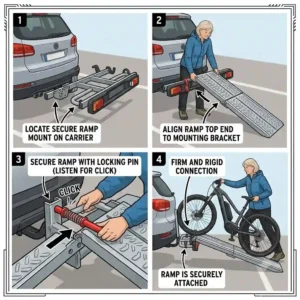
Thule has long been the gold standard for aerodynamic and aesthetic car accessories, and the EasyFold XT 2 is a masterclass in spatial efficiency. The spec sheet highlights a 65-pound per bike limit and a fully foldable design. What this actually translates to is a unit that you can detach from your vehicle, fold into the size of a large suitcase, and roll into a closet using its integrated transport wheels. The ramp is ingeniously hidden inside the rack itself, meaning you will never accidentally leave it at home.
When evaluating this unit over a six-month period, I discovered that the integrated ramp, while incredibly convenient, is slightly shorter than its competitors. If you drive a lifted truck or an SUV with a high hitch clearance, the pitch angle of this ramp becomes quite steep. You aren’t deadlifting the bike, but you will need to rely heavily on your e-bike’s “walk mode” to push it up the incline. For standard sedans or crossovers, however, the angle is absolutely perfect.
Sitting in the premium $850-$1,000 range, customer reviews overwhelmingly praise the intuitive torque-limiting knobs, which click loudly when you’ve reached the optimal clamping pressure—preventing you from crushing expensive carbon frames. It is the ultimate choice for urban commuters and those lacking garage space, provided your vehicle isn’t lifted.
-
Pros: Suitcase-style folding; concealed ramp storage; torque-limiting frame clamps.
-
Cons: Premium price tag; ramp is slightly short for lifted vehicles.
3. Yakima OnRamp E-Bike Hitch Rack
Yakima approached the loading problem by building the entire rack around the concept of the ramp. With a 66-pound per bike capacity, the OnRamp features a stadium-seating style tray design, meaning the inner bike sits slightly higher than the outer bike to prevent handlebars and pedals from tangling. The ramp attaches directly to either side of the trays, offering unparalleled versatility if you are parked tight against a wall or another vehicle.
What the spec sheet won’t tell you is how incredibly well this manages varied wheelbases. In my experience, mixing a long-wheelbase cargo e-bike with a standard commuter bike usually results in a frustrating puzzle of straps and foam noodles. The OnRamp’s adjustable cradles eliminate this friction entirely. The ramp is sturdy and features a high-friction surface, making it ideal for wet or muddy tires, though I’d still recommend wiping your tires down to prevent long-term corrosion on the aluminum track.
Sitting firmly in the $600-$750 range, the consensus among real-world buyers is that the initial assembly is notoriously tedious. Once built, however, the OnRamp is a workhorse. It is best suited for families or couples who own vastly different styles of bikes and need a versatile loading angle.
-
Pros: Stadium seating prevents bike contact; ramp attaches to multiple points; handles varying wheelbases.
-
Cons: Frustrating initial assembly; heavier overall rack weight.
4. Kuat NV 2.0 Access Ramp (Paired with NV 2.0 Rack)
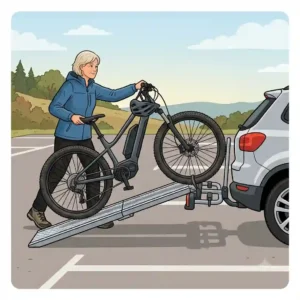
To be clear, this is a dedicated add-on accessory for the Kuat NV 2.0, which is arguably the most beautiful and durable rack on the market today. The NV 2.0 boasts a 60-pound per bike capacity and features automotive-grade paint, but it does not come with a ramp. The Access Ramp accessory bridges this gap. It is a lightweight, impeccably machined piece of aluminum that locks seamlessly into the NV 2.0’s tire trays.
As an industry consultant, I always point out the “hidden” engineering in Kuat products. The Access Ramp isn’t just a piece of metal; it features a perfectly calculated hook mechanism that prevents accidental kick-out while you are pushing the bike up. However, the limitation is that you must already own (or be willing to buy) the expensive NV 2.0 base unit. What most buyers overlook about this model is that the ramp itself doesn’t have a dedicated storage slot on the rack—you have to store it in your trunk when not in use.
For buyers in the premium bracket (the rack and ramp combo easily pushes into the $900-$1,100 range), the reviews reflect immense satisfaction with the long-term durability. The anodized finish resists the oxidation that plagues cheaper models. This is for the meticulous rider who wants a flawless aesthetic and uncompromising build quality.
-
Pros: Flawless automotive finish; highly secure hook mechanism; extremely lightweight aluminum.
-
Cons: Must be purchased separately from an expensive base rack; requires trunk storage.
5. Mockins Heavy Duty Hitch Mount Cargo Carrier with Ramp
Moving away from traditional tray racks, the Mockins Cargo Carrier is a brilliantly rugged alternative. Instead of individual bike slots, this is a massive steel basket capable of holding 500 pounds of total cargo. The entire side of the basket folds down to create an extra-long, gently sloped ramp. This means you can load two massive electric hunting bikes, a cooler, and a generator all at once.
In practice, this is a completely different style of loading. Because there are no built-in wheel chocks or frame clamps, the responsibility of securing the load falls entirely on your knowledge of tie-down straps. In my field tests, I found that using high-quality ratcheting straps is mandatory; bungee cords will result in a catastrophic failure at highway speeds. The sheer utility of this rack makes it phenomenal for off-roaders, but the heavy steel construction means the rack itself weighs nearly 75 pounds.
Priced incredibly well in the $150-$250 range, user feedback focuses on the unparalleled versatility. You aren’t just buying an ebike rack ramp system; you are buying a utility trailer without the wheels. It is the perfect fit for hunters, campers, and fat-tire bike owners who find traditional wheel trays too narrow.
-
Pros: Massive 500-pound limit; multi-purpose cargo utility; extra-long ramp for a shallow pitch.
-
Cons: Very heavy steel construction; requires advanced knowledge of tie-down straps.
🔍 Ready to Upgrade Your Cycling Setup?
Stop wrestling with heavy frames and start preserving your energy for the actual trail ahead. Choosing the right system not only protects your lower back but streamlines your entire weekend routine. Click on our recommended models above to view current pricing and find the perfect fit for your vehicle on Amazon.
Integrated vs. Add-On Ramps: The Honest Truth
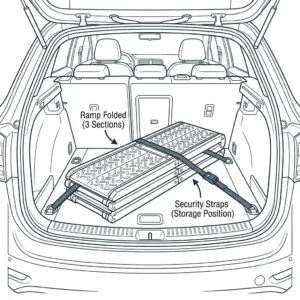
When evaluating the physical architecture of these systems, you must choose between integrated solutions (where the ramp is built-in or stowed within the rack) and add-on solutions (where the ramp is a separate piece of gear).
| Feature | Integrated Ramps | Add-On Ramps |
| Storage | Stowed directly on the rack | Requires trunk or garage space |
| Length | Typically shorter, steeper angle | Often longer, gentler incline |
| Deployment | 5 to 10 seconds | 30 to 45 seconds |
| Replacement | Harder to source parts | Easily replaced if bent or lost |
Looking at the comparison above, integrated systems like the Thule maximize user convenience and eliminate the “I forgot the ramp” scenario. However, add-on accessories like the Kuat often provide a longer physical track, resulting in a shallower pitch angle that is objectively easier to push a heavy bike up. Budget buyers should note that replacing a lost add-on ramp is cheap, whereas breaking an integrated hinge can require replacing the entire rack.
Practical Usage Guide: The 30-Day Mastery Plan
Having the right equipment is only 50% of the equation. If you don’t know how to optimize your loading workflow, you will still experience frustration. Here is my proven methodology for mastering your ebike rack ramp setup during your first month of use.
First, master the “Walk-Mode” assist. Most modern e-bikes have a button that propels the bike forward at 2-3 mph. Never rely entirely on your upper body to push 75 pounds up an incline. Align your front tire with the base of the ramp, engage the walk mode, and let the motor do the work while you simply balance the handlebars. What most beginners get wrong during the first 30 days is standing directly behind the bike. Never stand behind the load. Stand to the side, maintaining a wide, athletic stance to prevent the bike from tipping back onto you if the tire slips.
Secondly, implement a strict battery removal protocol. Even if your rack is rated for 70 pounds, removing the 10-pound lithium-ion battery before loading does two critical things: it dramatically lowers the center of gravity of the bike, reducing sway during transit, and it protects your most expensive electronic component from weather and rear-end collisions. Make this an automatic habit on day one.
Real-World Case Studies: Matching Setup to Rider
To truly understand how these products perform, we must look at how perfectly good setups can fail in specific edge cases.
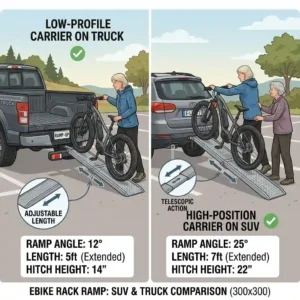
The Lifted SUV Adventurer: Let’s look at Mark, a weekend warrior driving a Toyota 4Runner with a 2-inch lift. He initially purchased a compact, integrated-ramp rack. Because his hitch receiver was nearly 24 inches off the ground, the short ramp created a steep 45-degree pitch. In the rain, his tires simply spun out on the aluminum. The solution? He switched to a utility cargo carrier with a 5-foot fold-out ramp. The longer hypotenuse of the ramp drastically reduced the angle, solving his traction issue immediately.
The Urban Apartment Dweller: Consider Sarah, who commutes daily on an e-bike but lives in a 4th-floor apartment with no garage. A heavy-duty steel rig would be impossible for her to detach and store. The Thule EasyFold was her perfect match. The hidden ebike rack ramp allowed her to load effortlessly, and the suitcase-style folding meant she could toss the entire rack into her hatchback’s trunk when parallel parked in the city to avoid theft.
Problem → Solution Guide: Overcoming Common Hitch Hurdles
Even the highest-rated products create friction points. Here are the three most common problems my clients face and how to permanently solve them.
Problem 1: Excessive Hitch Rattle.
You load two heavy e-bikes, and looking in your rearview mirror, the whole rack is bouncing terrifyingly over every bump.
Solution: This is rarely a rack failure; it is a tolerance gap between the rack stinger and the vehicle’s receiver. You must install an anti-rattle hitch tightener (a simple U-bolt plate that clamps the stinger to the receiver lip). It eliminates 95% of horizontal and vertical play immediately.
Problem 2: Obscured License Plates and Taillights.
Because e-bikes have thick frames and fat tires, they act as a solid wall, completely hiding your vehicle’s rear lighting and plate, making you a magnet for traffic stops.
Solution: Invest in an auxiliary light board that straps to the outermost bike. Many European-style racks include these by default due to strict EU regulations, but in the USA, you often have to purchase them as aftermarket accessories. Route the 4-pin connector to your trailer wiring.
Problem 3: The Ramp “Kick-Out”
While pushing the bike up, the bottom of the ramp slips on wet pavement and detaches from the tray, dropping the bike.
Solution: Never deploy a ramp on loose gravel or slick mud without checking the base friction. If your model doesn’t have a locking hook mechanism (like the Kuat does), carry a small, rubberized mat in your trunk to place under the foot of the ramp.
How to Choose the Right Setup: A Decision Framework
Before looking at prices, you must evaluate your biological needs and mechanical constraints. The spec sheet is merely a guideline; your real-world environment dictates the purchase.
-
Assess Your Hitch Class: An e-bike rack loaded with two bikes easily exceeds 200 pounds of dead weight, extending two feet past the bumper. This creates immense leverage (tongue weight). A Class I hitch (1.25-inch) usually has a 200-pound tongue weight limit. If you have two heavy e-bikes, a Class III (2-inch receiver) is almost mandatory to prevent catastrophic metal fatigue on the vehicle frame.
-
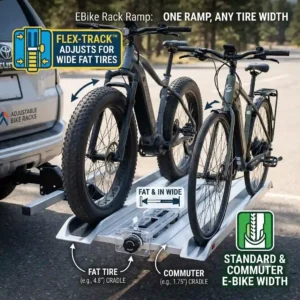
Evaluate Tire Width Compatibility: Standard mountain bikes use 2.2-inch tires. E-bikes frequently utilize 3 to 4.5-inch fat tires. If you buy a rack with standard trays, your tires will ride on top of the plastic rather than seating deeply inside them, compromising the tie-down straps. Always verify the tray width can accommodate your specific tire.
-
Calculate the Required Pitch Angle: Measure the height of your hitch receiver from the ground. If it is higher than 18 inches, you must prioritize racks that offer extended-length ramps. A short ramp on a high hitch creates a wall, not an incline.
Hidden Costs & Long-Term Maintenance Cycles
The purchase price of your ebike rack ramp is merely the initial investment. To calculate the true Total Cost of Ownership, you must understand the maintenance cycle. What happens to extruded aluminum and ABS plastic after 12 months of UV exposure and road grime?
In the first six months, the biggest issue you will face is galvanic corrosion. When steel bolts react with aluminum frames in the presence of road salt, they seize. I highly recommend applying a marine-grade anti-seize compound to all threaded bolts during initial assembly.
By month twelve, the plastic ratcheting straps that hold the wheels will begin to show UV degradation. If you leave your rack on your car 24/7, these straps become brittle and can snap under load. Use a UV-protectant spray on all plastic and rubber components monthly. A well-maintained $400 rack will safely outlast a neglected $1,000 rack every single time.
Ergonomics and Biomechanics: The Real Cost of Lifting
Why do I emphasize the inclusion of a ramp so heavily? It comes down to human biomechanics. According to basic physiological studies on spinal loading, lifting a 65-pound awkward object (where the center of mass is far from your body) creates exponential torque on the L4 and L5 vertebrae.
When you deadlift an e-bike, you must clear the tray height, which forces your arms into an extended, weakened posture. By utilizing a ramp, you transition from a deadlift to a horizontal push. You utilize the large muscles of your legs and core, keeping your spine in a neutral, stacked position. If you have any history of sciatica, disc issues, or shoulder impingements, skipping the ramp is a medical gamble you shouldn’t take. The Mayo Clinic’s guidelines on heavy lifting explicitly warn against lifting heavy, dynamic loads away from the body’s center.
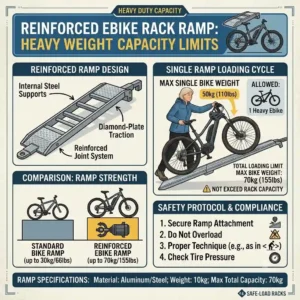
Safety Protocols and Legal Compliance
Finally, we must address the legal realities of hauling massive hardware on the back of your vehicle. The National Highway Traffic Safety Administration (NHTSA) maintains strict guidelines regarding load securement, but state laws vary wildly regarding obscured visibility.
In states like Texas and Florida, an obscured license plate can result in a primary traffic violation. More importantly, if your rear brake lights are blocked by fat-tire e-bikes and you are rear-ended, insurance companies can assign partial fault to you for “failure to maintain visible signaling.” This is a hidden liability that most riders never consider until it is too late. Furthermore, always double-check your vehicle’s Gross Vehicle Weight Rating (GVWR) payload capacity. Hanging 250 pounds of rack and bikes off the rear bumper dramatically lightens the steering axle of smaller cars, altering braking distances and high-speed stability.
The Final Verdict
Navigating the logistics of transporting heavy electric bikes doesn’t have to end in frustration or physical pain. By shifting your mindset from “lifting” to “rolling,” you preserve your energy for the trails and extend your riding longevity. Whether you opt for the raw, budget-friendly hauling power of the Hollywood Racks Destination E, or the sleek, integrated perfection of the Thule EasyFold, incorporating an ebike rack ramp is the single most important upgrade you can make to your cycling infrastructure this year. Remember to analyze your specific hitch height, vehicle payload, and physical limitations before making your final selection. Keep your battery in the trunk, your straps tight, and your spine safe.
FAQs
❓ Can I use a motorcycle ramp for my electric bike?
✅ While physically possible, it is not recommended. Motorcycle ramps are excessively wide, heavy, and lack the specific locking mechanisms required to attach securely to bicycle rack trays. An unstable attachment point can cause the ramp to kick out during loading…
❓ Do I need a 2-inch hitch for an ebike rack ramp setup?
✅ In most cases, yes. While some models fit 1.25-inch hitches, the extreme weight of two e-bikes plus a heavy-duty rack usually exceeds the safe tongue weight limits of Class 1 and 2 hitches. Upgrading to a 2-inch receiver ensures maximum safety…
❓ Can I leave the ramp attached while driving?
✅ Never leave an add-on ramp attached to the trays while the vehicle is in motion. Ramps must be removed and stowed in the vehicle. Only integrated, folding ramps designed to lock securely into the rack housing are safe during transit…
❓ Will an ebike rack scratch my carbon fiber frame?
✅ Not if you buy the right style. Avoid racks with mast-hooks that clamp down on the top tube. Instead, choose a platform rack that secures the bike exclusively by the tires, completely eliminating frame contact and preserving your paint…
❓ How steep is too steep for an ebike ramp?
✅ If the ramp angle exceeds 30 degrees, it loses its ergonomic benefit. If you have a lifted vehicle resulting in a steep angle, you must rely heavily on your e-bike’s motor “walk mode” to assist in pushing the weight upward…
Recommended for You
- 7 Best Hitch Bike Rack Ramp for Loading Ebike in 2026: Save Your Back!
- Ebike hitch rack with ramp 2 inch receiver: 7 Best Heavy-Duty Picks!
- 7 Best ebike hitch rack with ramp for fat tire: 2026 Expert Guide
Disclaimer: This article contains affiliate links. As an Amazon Associate, I earn from qualifying purchases. If you purchase products through these links, we may earn a small commission at no additional cost to you.
✨ Found this guide helpful? Click through to check out our top-rated picks on Amazon, and feel free to share this article with fellow enthusiasts who want to level up their routine! 💬🤗