There’s no feeling quite like it. 🚴♂️ You’re cruising up a hill, the wind is in your hair, and suddenly… nothing. The pedal assist dies. You look down, and the display is dark. That expensive, high-tech machine you love is suddenly just a very, very heavy bicycle. Yep, your battery is officially toast.
✨Was this helpful? Spread the word! 🚀
Before you panic and shell out $500+ at a bike shop, let’s talk. That big, mysterious box on your frame? It’s replaceable. And believe it or not, you can be the one to do it.
I get it. Messing with high-voltage lithium-ion batteries sounds… intimidating. We’ve all seen the scary videos. But here’s the secret: with the right parts and a little bit of caution, a DIY e bike battery replacement is 100% doable. In fact, it’s one of the most empowering upgrades you can make.
This isn’t just a simple parts swap; it’s a major upgrade opportunity. You can often get more range than your bike had when it was new. This guide is your complete, step-by-step plan. We’ll cover how to find the exact right battery, the safety steps you can’t ignore, and the tools you’ll need.
First, let’s look at the big picture. Are you a DIY warrior or is the bike shop a better call?
DIY vs. Professional e bike battery replacement
| Feature | DIY e bike battery replacement | Professional Bike Shop Service |
| Cost | 💰 Lower (Cost of battery + tools) | 💰💰 Higher (Battery + Labor, ~$100-$250 labor) |
| Time | 🕒 1-3 hours (plus research/shipping) | ⚡ Faster (Typically 1-2 days turn-around) |
| Skill Level | Medium. Requires basic tool use & caution. | Low. Just drop it off. |
| Warranty | Risk of voiding your bike’s warranty. | Maintains warranty; shop may warranty their work. |
| Risk | ⚠️ Moderate (If done wrong: damage, fire risk) | ✅ Very Low (Insured and experienced) |
| Best For | Tinkerers, budget-conscious riders, custom builds. | New riders, complex integrated systems, warranty holders. |
Still with me? Good. Let’s get to the good stuff.
Quick Comparison: Top Replacement Batteries & Tools
If you’re going to tackle the job of how to replace e bike battery, you need the right parts. Here are the top-rated replacement batteries and essential tools available right now.
| Product | Type | Voltage/Capacity | Best For |
| Unit Pack Power (UPP) 48V 20Ah | Replacement Battery (Hailong) | 48V, 20Ah | All-Round Value & DIY Builds |
| JOYISI 48V 15Ah Battery | Replacement Battery (Shark) | 48V, 15Ah | Downtube Mounts, Mid-Range |
| BAFANG 48V 17.5Ah Battery | Replacement Battery (OEM) | 48V, 17.5Ah | Bafang Mid-Drive Systems |
| Accolmile 36V 15Ah Battery | Replacement Battery (Rack) | 36V, 15Ah | Rear Rack E-Bikes |
| Violin 52V 20Ah Battery | Replacement Battery (High-Power) | 52V, 20Ah | High-Performance & 52V Systems |
| XOOL 80 in 1 Precision Screwdriver Set | Tool Kit | N/A | Removing Mounts & Connectors |
| AstroAI Digital Multimeter | Safety Tool | N/A | Verifying Voltage & Safety |
Top 7: Expert Analysis on Replacement Batteries & Tools
Choosing the right battery is 90% of the job. I’ve dug through the options, analyzed customer feedback, and broken down the real-world performance of the best replacement batteries and tools for the job.
1. Unit Pack Power (UPP) 48V 20Ah Ebike Battery
This is probably the most popular and well-known “Hailong” style replacement battery on the market. Unit Pack Power (UPP) has built a reputation in the DIY e-bike community for delivering reliable batteries at a fantastic price.
-
Detailed Specifications:
-
Voltage: 48V
-
Capacity: 20Ah (also available in 13Ah, 15Ah, 17.5Ah)
-
Cells: Often uses high-quality 18650 cells (like Samsung or LG, but verify with seller).
-
BMS: Built-in 30A (or higher) Battery Management System.
-
Case Type: Hailong (common downtube mount, often fits existing cradles).
-
Includes: Battery, mounting cradle with keys, and a 2A or 3A charger.
-
-
Customer Review Analysis:
-
Users consistently praise the value and the increased range. Many report getting 50+ miles on a single charge.
-
The most common “con” is the bulkiness of the 20Ah size—it’s a big battery, so you must measure your frame.
-
Installation is rated as straightforward, as the included cradle is easy to mount on standard water bottle bosses.
-
-
Warranty: Typically a 1-year warranty, which is standard for third-party sellers.
-
Professional Applications: This is the go-to for DIY builders and for replacing batteries on many direct-to-consumer e-bike brands that use the Hailong case.
| Pros | Cons |
| ✅ Excellent value for the capacity. | ⛔ The 20Ah model is large and heavy. |
| ✅ Often uses high-quality brand-name cells. | ⛔ Included 2A charger is slow for a 20Ah battery. |
| ✅ Includes a new mounting cradle. | ⛔ Quality control can vary; buy from a reputable seller. |
| ✅ 30A BMS is robust for most 500W-1000W motors. |
2. JOYISI 48V 15Ah Ebike Battery
The JOYISI 48V 15Ah Battery is a “shark” style pack, which is one of the most common form factors on modern e-bikes. It’s slimmer than the Hailong case, making it a great mid-range option for those who value aesthetics and fit.
-
Detailed Specifications:
-
Voltage: 48V
-
Capacity: 15Ah
-
Cells: High-quality 18650 cells.
-
BMS: Built-in 30A BMS.
-
Case Type: Downtube “Shark” style.
-
Features: Includes USB port for charging a phone, LED power indicator.
-
Includes: Battery, new mounting base, keys, and charger.
-
-
Customer Review Analysis:
-
People love the form factor. It’s a common replacement for brands like Rad Power Bikes, Juiced, and others (though compatibility must be verified).
-
The USB port is a surprisingly popular feature for commuters and delivery riders.
-
Negative feedback usually relates to the mounting bracket not perfectly aligning with old holes, which can require minor drilling (a common issue with any universal replacement).
-
-
Warranty: 1-year warranty is standard.
-
Professional Applications: Ideal for replacing stock batteries on downtube-mounted e-bikes where the original manufacturer charges a huge premium for an OEM replacement.
| Pros | Cons |
| ✅ Sleek, modern “shark” profile. | ⛔ Mounting bracket may require slight modification. |
| ✅ Built-in USB charging port. | ⛔ 15Ah is good, but not as high-capacity as others. |
| ✅ Good quality cells for the price. | ⛔ Lock mechanism can feel a bit flimsy. |
| ✅ Fits many popular e-bike frames. |
3. BAFANG 48V 17.5Ah Downtube Battery
If your e-bike has a Bafang mid-drive motor (like a BBS02 or BBSHD), this BAFANG 48V 17.5Ah Battery is often the “OEM” (Original Equipment Manufacturer) choice. It’s designed to communicate perfectly with Bafang systems and uses a specific, robust mount.
-
Detailed Specifications:
-
Voltage: 48V
-
Capacity: 17.5Ah
-
Cells: Premium Samsung, LG, or Panasonic 18650 cells.
-
BMS: High-performance BMS matched to Bafang controllers.
-
Case Type: Bafang-specific “Shark” (often called DP-6 or similar).
-
Features: Deep-sleep mode, high-quality construction.
-
Includes: Battery, charger, and a very robust mounting cradle.
-
-
Customer Review Analysis:
-
This is a premium product. Users report extreme reliability and “plug-and-play” compatibility with their Bafang kits.
-
Reviewers note the solid feel of the battery and mount—it doesn’t rattle or shake.
-
The main complaint is the price. It’s significantly more expensive than a generic brand, but you’re paying for the name and the integration.
-
-
Warranty: Often comes with a 12-18 month warranty, which is better than average.
-
Professional Applications: The only choice for many high-end Bafang builds or for replacing a failed OEM Bafang battery.
| Pros | Cons |
| ✅ Genuine OEM product for Bafang systems. | ⛔ Premium price tag. |
| ✅ Uses top-tier Samsung/LG/Panasonic cells. | ⛔ Specific form factor may not fit non-Bafang bikes. |
| ✅ Excellent build quality and reliability. | |
| ✅ High-performance BMS. |
4. Accolmile 36V 15Ah Rear Rack Ebike Battery
Not all batteries live on the downtube. Many commuter and cruiser bikes use a rear rack battery. The Accolmile 36V 15Ah Battery is a fantastic replacement for this style, often called a “silverfish” or “carrier” battery.
-
Detailed Specifications:
-
Voltage: 36V (This is key! Not for 48V bikes).
-
Capacity: 15Ah
-
Cells: High-quality 2500mAh 18650 cells.
-
BMS: 20A BMS (perfect for 250W-500W 36V motors).
-
Case Type: Rear Rack / Carrier mount.
-
Features: Taillight built into the battery case, handle for easy carrying.
-
Includes: Battery, keys, and 36V charger.
-
-
Customer Review Analysis:
-
Users love this as a replacement for older e-bikes or cruiser models (like Ancheer, Nakto, or early Sondors).
-
The integrated taillight is a huge safety bonus.
-
The main point of confusion for buyers is the connector. You must check if your controller uses the 2-pin or 4-pin connector and buy the matching version.
-
-
Warranty: 12-month warranty.
-
Professional Applications: Perfect for reviving older commuter e-bikes or step-thru cruisers that use this common rear rack form factor.
| Pros | Cons |
| ✅ Common replacement for rack-style e-bikes. | ⛔ Only for 36V systems. |
| ✅ Integrated taillight is a great safety feature. | ⛔ Must verify the connector type (2-pin vs 4-pin). |
| ✅ Handle makes it easy to carry. | ⛔ Higher center of gravity (issue with all rack batteries). |
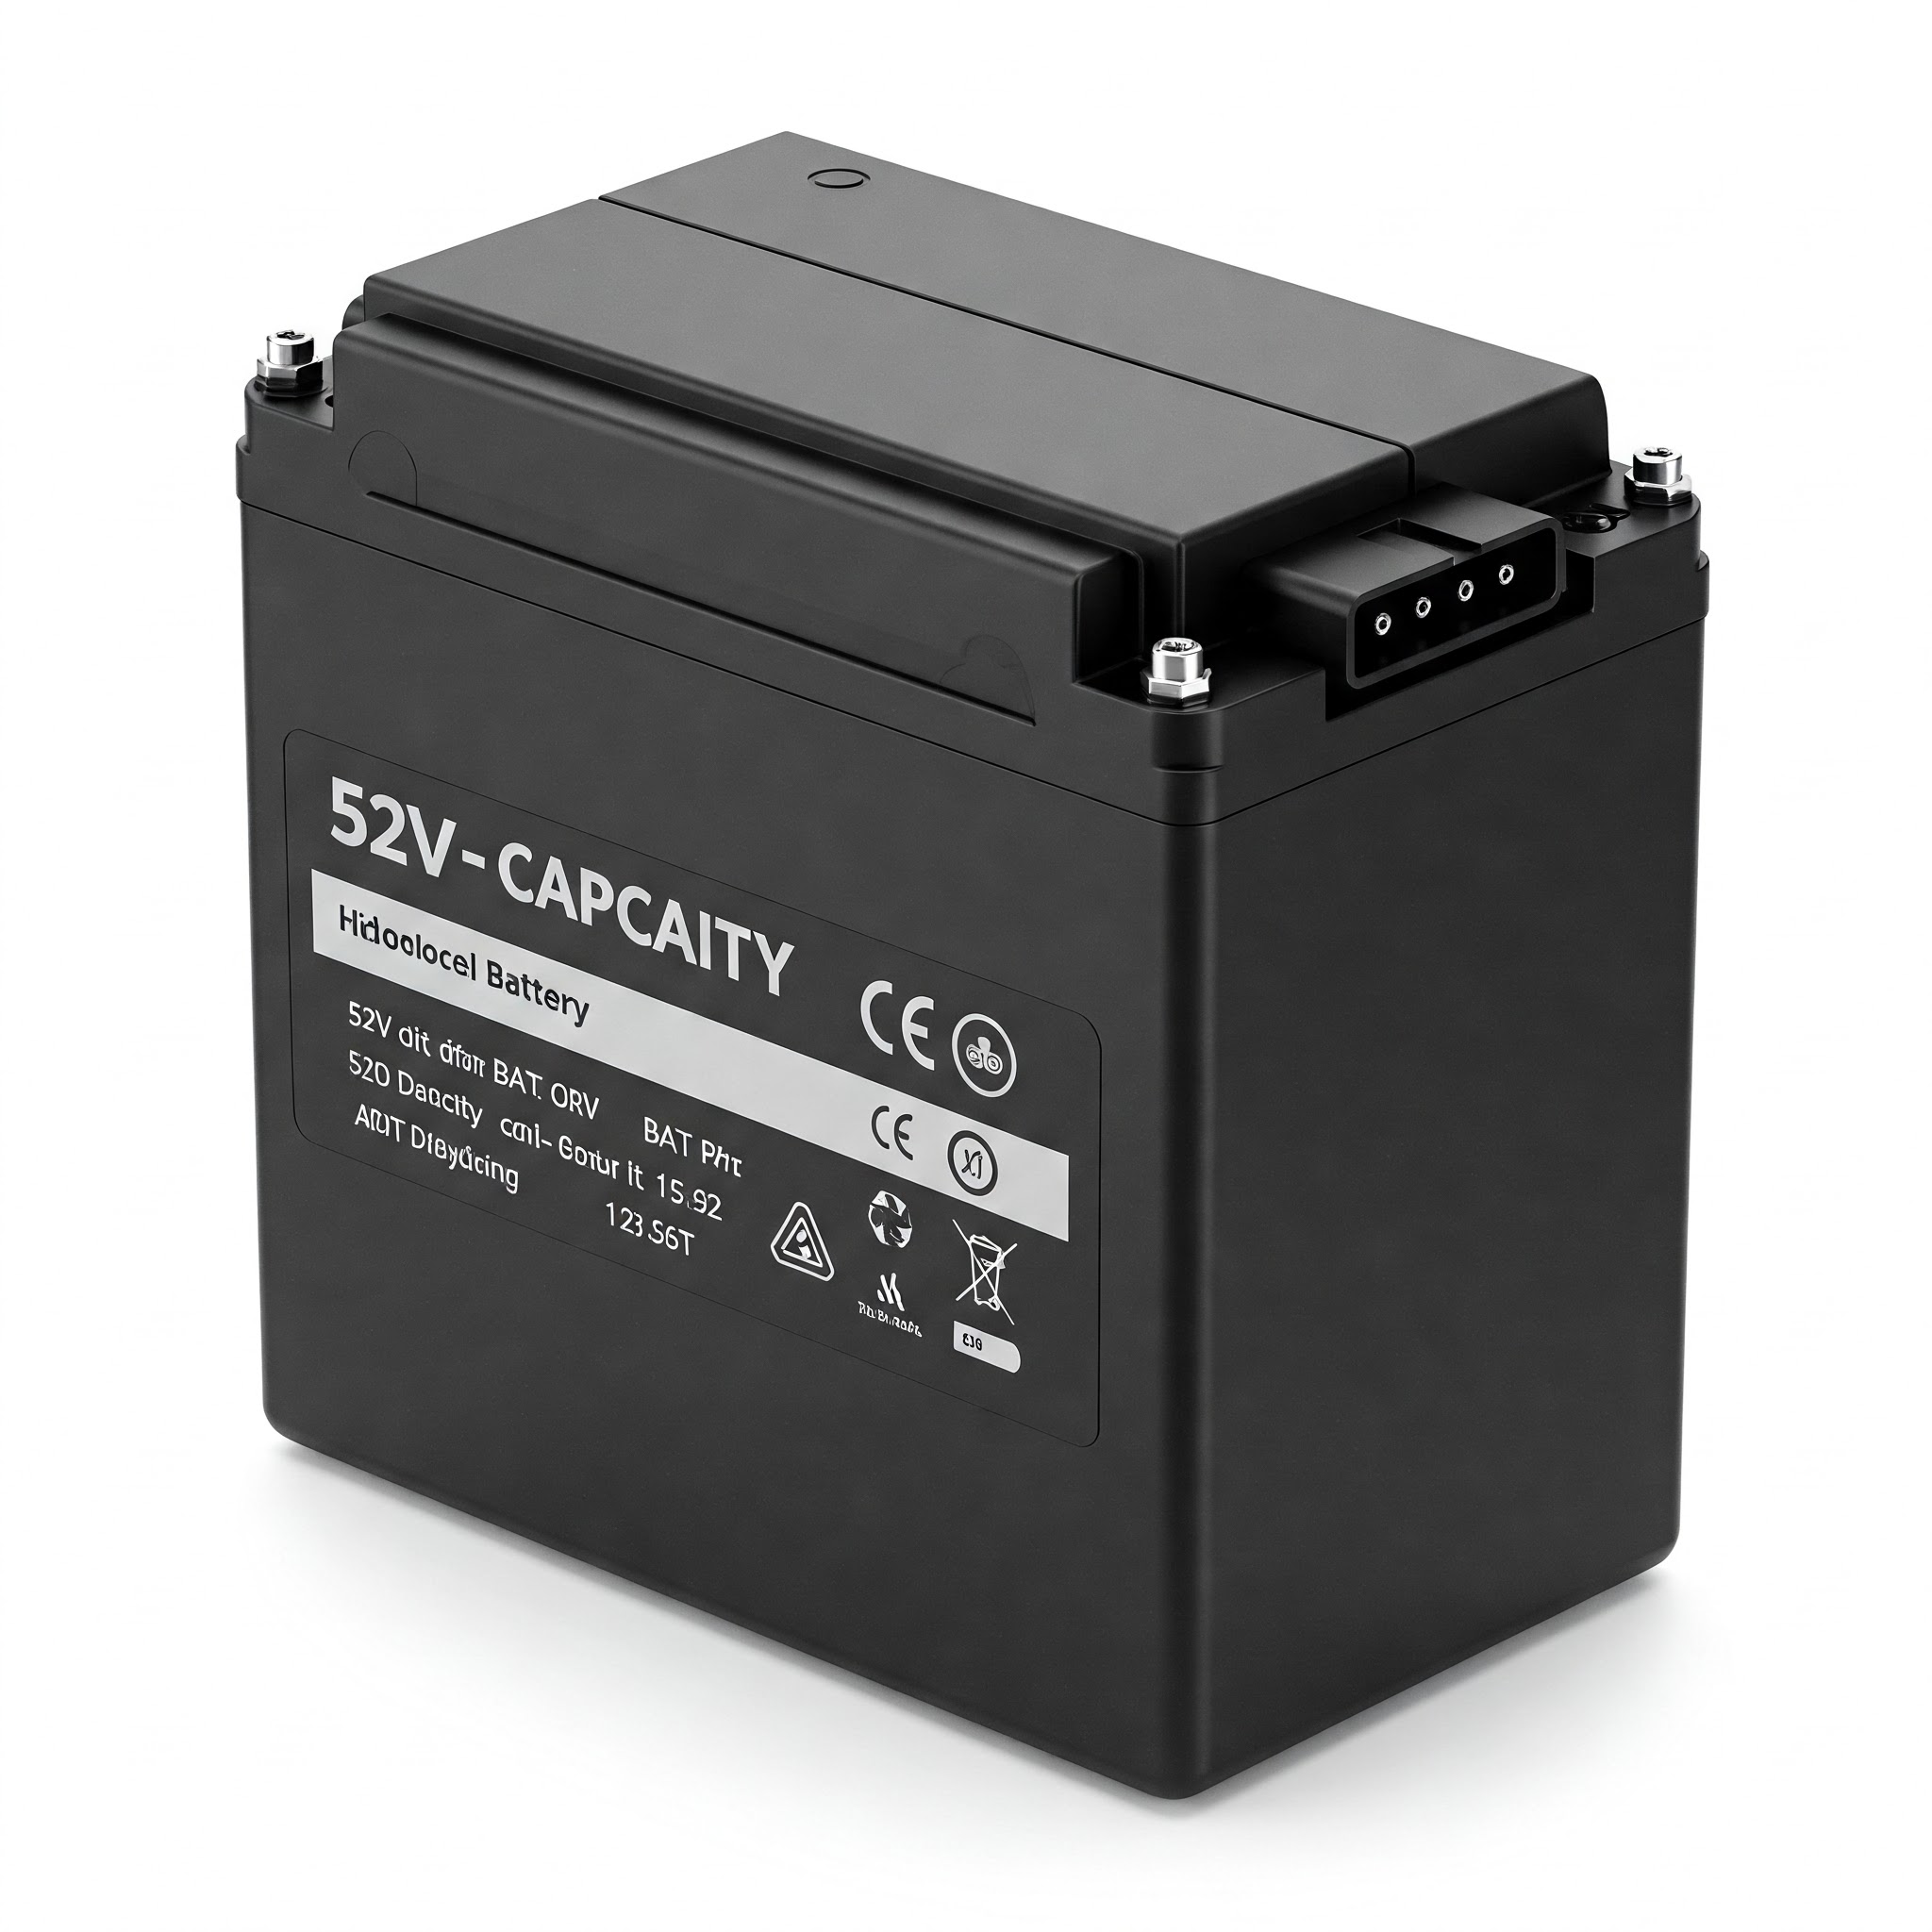
5. Violin 52V 20Ah Ebike Battery
For the high-performance crowd. A 52V system provides more “punch” and higher top speeds than a 48V system. The Violin 52V 20Ah Battery is a beast, designed for powerful 1000W-1500W motors.
-
Detailed Specifications:
-
Voltage: 52V (Not compatible with 48V systems!)
-
Capacity: 20Ah
-
Cells: Premium-grade 18650 cells.
-
BMS: Heavy-duty 40A BMS.
-
Case Type: Large Hailong (Jumbo Shark).
-
Features: Waterproof and solid case.
-
Includes: Battery, 52V charger (often 3A or 4A), and mount.
-
-
Customer Review Analysis:
-
This is a DIY builder’s dream. Users pair this with powerful mid-drives or hub motors for incredible performance.
-
The range is, as expected, massive.
-
This battery is very large and heavy. Buyers stress the importance of “making a cardboard cutout” to test the fit in their frame triangle before ordering.
-
-
Warranty: 12-month warranty.
-
Professional Applications: For high-speed commuters, e-mtb builds, or cargo bikes that need a powerful, long-range 52V system.
| Pros | Cons |
| ✅ Massive 1040Wh capacity for extreme range. | ⛔ 52V is not compatible with 48V or 36V systems. |
| ✅ High-output 40A BMS for powerful motors. | ⛔ Extremely large and heavy. |
| ✅ Great value for a high-performance 52V pack. | ⛔ Overkill for a standard 500W e-bike. |
6. XOOL 80 in 1 Precision Screwdriver Set
You can’t do a DIY e bike battery swap without tools. The XOOL 80 in 1 Precision Screwdriver Set is the kind of “buy it once” kit that will handle 99% of the screws on your e-bike.
-
Detailed Specifications:
-
Bits: 56 precision bits (Phillips, flathead, Torx, Hex, etc.).
-
Tools: Includes driver handle, extension shaft, pry tools, tweezers.
-
Case: Organized, portable case.
-
Application: Perfect for everything from mounting the cradle (Hex/Allen bits) to opening controller boxes (small Phillips/Torx bits).
-
-
Customer Review Analysis:
-
This is an “Amazon’s Choice” for a reason. Users are blown away by the sheer number of bits for the price.
-
It’s not Snap-On quality, but for hobbyist use, it’s more than durable enough.
-
The magnetic tip driver and flexible extension are called out as lifesavers for hard-to-reach bolts.
-
| Pros | Cons |
| ✅ Incredible value, has almost every bit you’ll need. | ⛔ Bits are not for high-torque “stuck” bolts. |
| ✅ Well-organized case. | ⛔ Metal is softer than pro-grade tools. |
| ✅ Includes essential pry tools and tweezers. |
7. AstroAI Digital Multimeter
This is your most important safety tool. A multimeter is not optional for a guide on how to replace e bike battery. The AstroAI Digital Multimeter is user-friendly and perfect for beginners.
-
Detailed Specifications:
-
Functions: Measures AC/DC Voltage, DC Current, and Resistance.
-
Display: Backlit LCD screen.
-
Safety: Built-in fuses, data hold.
-
Use Case: You must use this to check the voltage of your new battery before plugging it in. A 48V battery should read ~42V-54.6V. If it reads 0V, it’s defective.
-
-
Customer Review Analysis:
-
Praised as the perfect “first multimeter.” It’s cheap, easy to use, and accurate enough for all home and auto tasks.
-
The backlit screen and “hold” function get a lot of love.
-
It’s not for professional electricians, but for a DIY e bike battery change, it’s perfect.
-
| Pros | Cons |
| ✅ Inexpensive and very easy to use. | ⛔ Not for high-amperage (AC) measurement. |
| ✅ Backlit screen and data hold. | ⛔ Test leads feel a bit cheap (but are replaceable). |
| ✅ The essential safety tool for this job. |
🔍 Find Your Perfect Upgrade! ⚡
Ready to double your range? Upgrading your Amp-Hours (Ah) is the best way to do it. Check out high-capacity options like the Unit Pack Power 48V 20Ah to see if it fits your frame and budget!
💬 Just one click – help others make better buying decisions too!😊

Before You Buy: The Critical Compatibility Check
Okay, you’ve seen the options. Now, how do you avoid buying a $400 paperweight? An e bike battery replacement is all about matching five key things. Get these right, and the rest is easy.
1. Voltage (V): The Non-Negotiable ⚡
This is the one rule you cannot break. Voltage must match.
-
If your bike is 48V, you must buy a 48V battery.
-
If your bike is 36V, you must buy a 36V battery.
Putting a 48V battery on a 36V system will instantly fry your controller. Putting a 36V battery on a 48V system won’t work at all.
How to check: Look at the label on your old battery. It will be printed right on it (e.g., “36V 10Ah”). You can also check the label on your charger. A 48V charger will list an output of 54.6V, and a 36V charger will list an output of 42V.
2. Capacity (Ah): Your “Gas Tank” ⛽
Capacity, measured in Amp-Hours (Ah), is your range. This is the one spec you can (and probably should) upgrade!
-
If your old battery was 10Ah and you buy a 20Ah battery, you will get double the range.
-
The only limit is physical size. A 20Ah battery is nearly twice as big as a 10Ah battery. You must measure your frame to make sure the new, larger battery will physically fit.
3. Physical Size & Mount (The “Form Factor”)
This is where most DIYers mess up. You can’t just jam a square peg in a round hole. You need to match the type of battery and its mounting cradle.
Comparison Table: Common e bike battery Mount Types
| Mount Type | Location | Common On | Pros | Cons |
| Downtube (Shark) | Top or bottom of downtube | Most modern e-bikes | Good weight distribution | Specific mounting bracket needed. |
| Rear Rack | Integrated into or on top of a rear rack | Commuter, cruiser bikes | Easy to access, leaves frame open | Higher center of gravity. |
| Hailong Case | Downtube (often on a bottle cage mount) | DIY kits, older models | Very common, many replacements | Can be bulky. |
| Integrated (In-Tube) | Fully inside the downtube | Premium, high-end bikes | Sleek look, protected | ⛔ Very hard to replace DIY. |
My advice: Take your old battery off. Take a picture of the mounting plate on the frame. Compare it exactly to the pictures of the mounting plate for the new battery. When in doubt, plan on using the new mounting plate that comes with your replacement battery.
4. The Connector: The Final Handshake 🤝
The battery has to plug into your bike’s controller. These connectors must match.
-
Common types: XT60 (yellow), XT90 (larger, yellow), Anderson (red/black), Bullet (small, round).
-
Most replacement batteries (like the UPP or JOYISI) come with a pigtail adapter, but it’s so much easier if the connector on the battery cradle matches your controller’s connector from the start.
-
Advanced tip: If they don’t match, you can cut the old connector off and solder/crimp it onto the new battery cradle wires. This is an advanced step and requires knowledge of polarity (positive to positive, negative to negative).
5. BMS (Battery Management System): The Unsung Hero
The BMS is the battery’s onboard computer. It protects the cells from over-charging, over-discharging, and balances them.
-
A cheap, no-name battery will have a cheap, unreliable BMS. This is where failures happen.
-
This is why I recommend trusted brands like UPP, JOYISI, or BAFANG. They use a BMS rated for the right amperage (e.g., a 30A BMS for a motor that pulls 25A).
-
A good BMS is the key to battery longevity and safety. For more, check out this deep-dive on what a BMS does from the experts at Battery University.
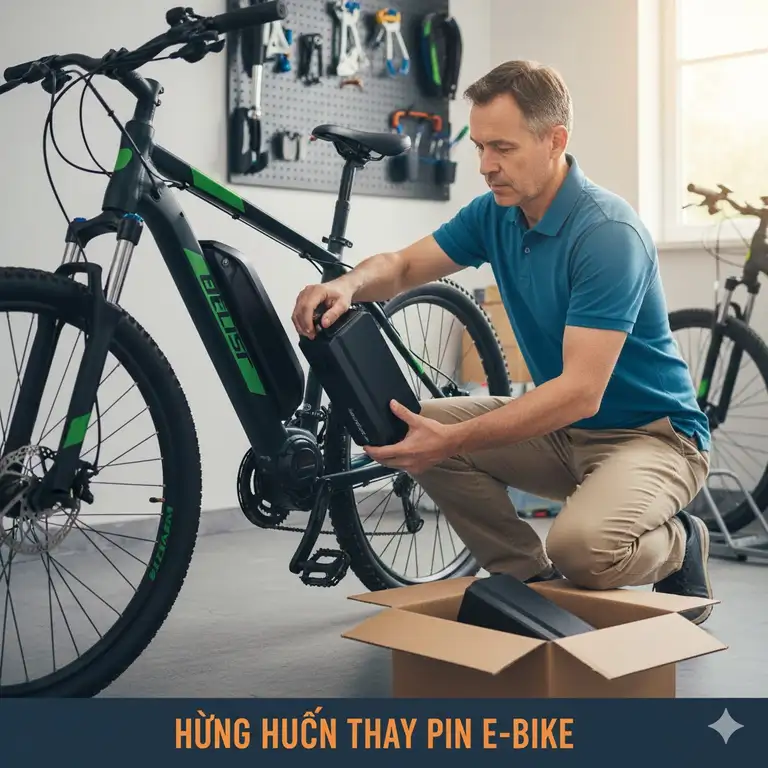
The Step-by-Step Guide: How to Replace e bike battery Safely
You’ve done your research. Your new battery has arrived. You’ve got your tools. Let’s do this.
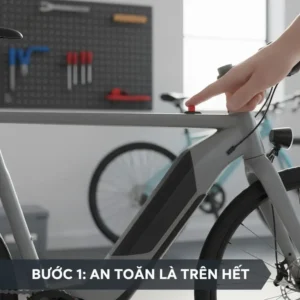
Step 0: Safety First, Seriously ⚠️
I’m not trying to be your mom, but listen up. Lithium batteries store a massive amount of energy.
-
Work in a dry, well-ventilated area (like a garage or patio). Not on your carpet.
-
Wear safety glasses. 👓
-
Have a fire extinguisher (Class ABC is good, Class D is for metals) nearby.
-
NEVER puncture, crush, or short-circuit a battery. If you short the terminals (e.g., touch positive and negative with a metal tool), it will create a huge spark, melt the tool, and could start a fire.
-
Handle the battery with care. Don’t drop it.
Step 1: Gather Your Tools
-
Your new, fully compatible battery.
-
The key for your old battery lock.
-
Allen/Hex key set (from your XOOL 80 in 1 Precision Screwdriver Set).
-
Your AstroAI Digital Multimeter.
-
Zip ties (for cable management).
-
Work gloves.
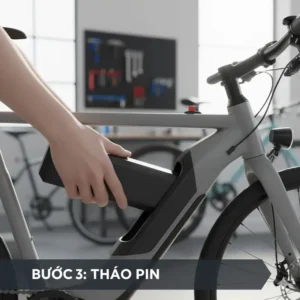
Step 2: Power Down and Disconnect
-
Turn your e-bike’s power system completely OFF.
-
Unlock the old battery from the frame using its key.
-
Carefully slide or lift the old battery out of its cradle.
-
If the battery cradle is wired directly, move to the next step. If the battery itself has a connector, disconnect it.
Step 3: Inspect and Remove the Old Cradle
-
Look at the cradle your old battery sat in. Is it the same as the one that came with your new battery?
-
9 times out of 10, you will need to replace the cradle.
-
Follow the wire from the cradle to your controller (it’s usually tucked into the frame). Disconnect it.
-
Use your Allen keys to unscrew the old cradle from the frame. It’s usually held on by 2 or 3 bolts in the water bottle mounts.
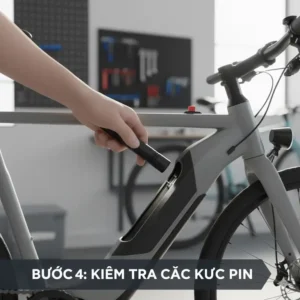
Step 4: Verify Your New Battery (CRITICAL STEP)
-
Take your new battery out of the box. Do not install it yet.
-
Turn on your AstroAI Digital Multimeter and set it to DC Voltage (V⎓ or VDC).
-
Touch the red probe to the positive (+) terminal and the black probe to the negative (-) terminal on the battery’s output connector.
-
A “48V” battery should read between ~42V (empty) and ~54.6V (full).
-
A “36V” battery should read between ~30V (empty) and ~42V (full).
-
If it reads 0V or a very low number, the battery is dead on arrival. Do not install it. Contact the seller.
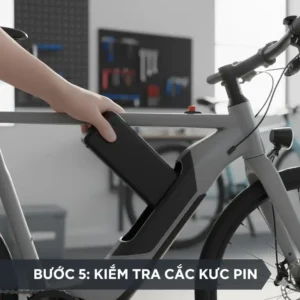
Step 5: Install the New e bike battery Cradle
-
Bolt the new cradle (that came with your new battery) onto your bike’s frame where the old one was.
-
Route the new cradle’s power wire to your controller.
-
Connect the new cradle’s connector to your controller’s connector. This is where you confirmed in the “compatibility check” that they match.
-
If they don’t match, now is the time for that advanced-step soldering job.
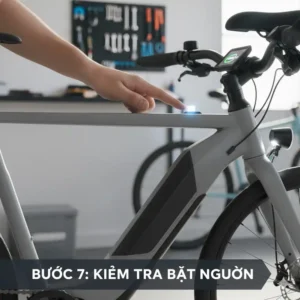
Step 6: Install and Test
-
Slide the new battery into the new cradle until it clicks firmly into place.
-
Lock it with the key.
-
Gently wiggle the battery. Is it secure? It shouldn’t rattle.
-
Okay, moment of truth.
-
Turn on your e-bike’s display.
-
…Does it light up? If yes, congratulations! 🥳
-
Test safely: Without riding the bike, lift the rear wheel off the ground. Gently apply the throttle or turn on pedal assist and spin the cranks.
-
Does the wheel spin? If it does, you have successfully completed the e bike battery replacement.
Step 7: Tidy Up and Charge
-
Use zip ties to secure any loose wires so they can’t get snagged.
-
CRITICAL: Plug your bike in using the NEW charger that came with your NEW battery. Do not use your old charger, even if the plug fits. Voltages or charging logic might be different and it can be a fire hazard.
-
Let it charge to 100%.
What to Do With Your Old e bike battery? (Recycling) ♻️
You’re not done yet! You are now in possession of a hazardous waste item.
-
DO NOT throw your old battery in the regular trash. It’s a massive fire hazard for sanitation trucks and landfills, and it’s terrible for the environment.
-
DO NOT leave it in your garage for a year.
-
You must take it to a certified e-waste or battery recycling center.
-
The best resource in the USA is Call2Recycle. Use their drop-off locator to find a place near you (Home Depot, Lowe’s, and many bike shops are partners).
Advanced Comparisons for the e bike battery change
You wanted the details? You got ’em. Here are a few more tables to help you understand the tech.
Comparison Table: Battery Chemistry Breakdown
| Chemistry | Energy Density | Lifespan (Cycles) | Safety | Cost |
| Lithium-Ion (NMC) | High (e.g., 18650 cells) | 800-1500 | Good (requires BMS) | $$$ |
| Lithium-Polymer (LiPo) | Very High | 300-500 | ⚠️ Lower (sensitive) | $$$ |
| Lithium Iron Phosphate (LiFePO4) | Medium | 2000-5000+ | ✅ Excellent | $$$$ |
| Lead Acid (SLA) | ⛔ Very Low | 200-400 | Good | $ |
| (Note: 99% of modern e-bikes, including all recommended here, use Lithium-Ion (NMC) 18650 cells.) |
Comparison Table: Cost Analysis: DIY vs. Pro (Expanded)
| Cost Factor | DIY e bike battery change | Pro Shop Service |
| Battery Cost | $200 – $800 (You choose) | $300 – $1000+ (Shop’s markup) |
| Tool Cost | $20 – $50 (One-time) | $0 |
| Labor Cost | $0 (Your time) | $100 – $250 |
| Total (Est.) | $220 – $850 | **$400 – $1250+** |
| Hidden Cost | Risk of buying wrong part. | Diagnosis fee (if it’s not the battery). |
Comparison Table: Performance Metrics: Upgrading Capacity
| Original Battery | Upgraded Battery | Estimated Range Increase | Estimated Cost | Weight Change |
| 48V 10Ah (480Wh) | 48V 15Ah (720Wh) | ~50% | +$150-$200 | +2-3 lbs |
| 48V 10Ah (480Wh) | 48V 20Ah (960Wh) | ~100% | +$300-$400 | +4-6 lbs |
| 36V 13Ah (468Wh) | 36V 17Ah (612Wh) | ~30% | +$100-$150 | +2-3 lbs |

Troubleshooting Your e bike battery replacement
Uh oh. Something went wrong. Don’t panic. Let’s check the common issues.
Problem: My new battery is installed, but the bike won’t turn on!
Solution 1: Is the battery itself turned on? Many batteries (like the UPP) have a separate “O / I” switch on the case. Make sure it’s in the “I” (on) position.
Solution 2: Check the key. Is it just for locking, or does it also “activate” the battery? Try turning the key to an “on” position.
Solution 3: Re-check all your connections. Is the main connector to the controller plugged in all the way? Are the pins on the cradle clean and making contact?
Solution 4: Check the fuse. Many batteries have a replaceable blade fuse on the case. See if it’s blown.
Problem: The battery doesn’t fit the cradle!
Solution: You bought the wrong form factor. This is the most common DIY mistake, and it’s heartbreaking. Do not try to force it or “rig” it with zip ties. This is incredibly dangerous. You must return the battery and buy the correct shape and size.
Problem: The bike turns on but cuts out under a heavy load (like going uphill).
Solution 1: This is likely a BMS issue. The battery’s BMS might have too low of a “continuous discharge” rating (Amps) for your motor. Your motor is asking for more power than the BMS will allow.
Solution 2: It could also be a loose connection that separates when the bike flexes or vibrates. Re-check all your wiring.
For more advanced diagnostics, I recommend checking out forums or resources like Ebike School to learn about controller-BMS communication.
Ready to Ride Again? 🚴♂️
Don’t let a dead battery sideline you. From the ultra-reliable BAFANG 48V 17.5Ah to the versatile JOYISI 48V 15Ah, the perfect replacement is waiting. Grab your battery, grab your tools, and reclaim your ride today!
Conclusion: Get Back on the Road ⚡
See? That wasn’t so bad. Taking on the task of how to replace e bike battery can feel like a monster project, but it’s really just a series of simple, careful steps. You’ve learned how to check for compatibility, what parts to buy, and the exact steps to perform the installation safely.
The best part? You just saved yourself hundreds of dollars, and you probably upgraded your bike in the process. That 20Ah battery is going to feel amazing on your next long ride. You’ve gained the knowledge, you’ve got the power, and now you’re an e-bike maintenance pro.
FAQs
✅ A replacement e bike battery typically costs between $200 and $800. A standard 36V or 48V battery from a quality brand like UPP or JOYISI falls in the $250-$450 range, while premium or high-capacity (20Ah+) batteries from brands like Bafang can be $600 or more...
✅ No, not without high risk. A 52V battery's full charge is over 58V, while a 48V controller's capacitors are usually rated for 63V max. This leaves no safety margin and can easily fry your controller. You should only use a 52V battery with a 52V-compatible controller...
✅ Amazon is a popular choice for DIY replacements, offering brands like Unit Pack Power (UPP), JOYISI, and others with fast shipping. You can also buy directly from your e-bike manufacturer for an OEM battery (this is more expensive) or from specialized e-bike parts websites...
✅ Most modern lithium-ion e-bike batteries last for 800-1500 charge cycles, which typically translates to 3-5 years of regular use. You'll know it's time for a replacement when you notice a significant drop in your total range (e.g., a ride that used to take 50% of your battery now takes 80%)...
✅ Rebuilding a pack (replacing the individual 18650 cells) is an extremely advanced and dangerous task. It requires specialized equipment like a spot-welder and deep knowledge of electronics and battery safety. For 99.9% of people, it is much safer and more practical to buy a complete, new battery pack... ❓ How much does an e bike battery replacement cost?
❓ Can I use a 52v battery on a 48v e bike?
❓ Where to buy a replacement e bike battery?
❓ How long does an e bike battery last before replacement?
❓ Can I rebuild my e bike battery pack?
Recommended for You
- 7 Top Rated Electric Bikes for City Commuting: 2025 Urban Guides 🚴♂️
- 7 Electric Bike with the Longest Battery Range 2025 for Unstoppable Adventures
- 7 Best Step-Through Electric Bikes for Short Riders 2025
Disclaimer: This article contains affiliate links. If you purchase products through these links, we may earn a small commission at no additional cost to you.
✨ Found this helpful? Share it with your friends! 💬🤗